Sunday, June 26, 2011

Kitchen Before-and-After

As most of you know, I love a red kitchen. And I really do like the red I chose for my kitchen. Unfortunately, it's really for some other kitchen. Some larger, more airy kitchen. I think it would be a definite fail if I had painted the cabinets the color I intended. As it is, I think the white off-sets some of the darkness. It's still a little dark for the kitchen, but it's OK. I think I'm going to get some rope lights and put them on top of cabinets to cast more light on the red.


Kitchen Cabinets

I have repainted my kitchen a vaguely questionable color. I'll post pictures of the whole thing in a second, but I thought I'd focus on the cabinets first. They are super cheap cabinets that are a mix of wood (a small mix), paneling, and particle board.


I meant to paint them off-white, but the store failed to actually tint my paint.  Being the bright creature that I am, I didn't notice until half way through the second coat.  But it actually worked out -- I think it makes my questionable wall color slightly (though not entirely) less questionable.

However, because of the paneling and particle board, I first had to paint it with a primer.  I used Zissner, which is the same stuff I used on The Thing. Below is what they looked like after the primer.


The hardware on my cabinets was also atrocious.  The collection in the tupperware is the original stuff.  The stainless steel on the left is what I contemplated changing it to, but that nonsense costs money.  Kind of a lot, even for something relatively cheap.  Those suckers add up.  So then I tried using the spray paint that we used on my lighting, but I didn't really like it.


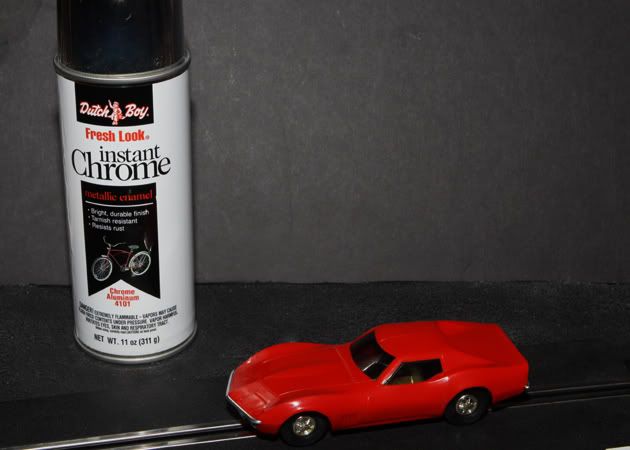
Well, then I saw this instant chrome stuff (below was the only picture online I could find), and I thought to myself, man, that is klassy.  So, naturally, I got it.


First, I lined them up and primed them all.


Of course, I was a total doofus and I didn't protect my hands, so I had these zombie fingers.  Very clever, Reavis.


Then I used my brain piece and put on gloves.

Aces!


Then it was time for the chrome.  It dried really fast -- almost immediately, in fact.  No doubt lots of cancer-causing chemicals responsible for that.

Shiny!


So, anyways, this is what I ended up with.  It's far from ideal, but it's free.  I'm willing to live with a lot when it's free.  But I want to know what you think!  Is it just ticky, totally tacky, or full-blown ticky tacky?  Let me know, because after the picture is the first ever Gracewood Eats poll.  Answer it!


Saturday, May 21, 2011

Arts & Crafts

I got into an artsy mood today.  First, I played with colored pencils.  But then I had some real fun playing with my new encaustic set! 

In each little tin is colored wax.  The two light colored ones on the right are a cleaning wax and a clear wax.  I used a pancake griddle to melt the wax.  Then you can use the cake griddle as your palette!  Fun, right?!

OK, so my tree looks a little arts & craftsy and/or middle school art homework project, but whatevs!  It was fun, and I went ahead and framed that sucker.  I'll probably find a place in my bedroom for it.


The cool thing about painting with wax is that it is very textural. I included this picture so you could see more how textured it is.

Future visitors -- if you want to play with my encaustics when you visit me, I thoroughly support that!

Baked Beans

I went to a potluck type dinner thing this week, and I was assigned baked beans. Melissa has some yummy baked beans, but I didn't plan enough in advance to get her recipe. I looked something up online, but I don't remember where I got it from, and I changed it anyway.

Here goes:

Ingredients
2 cans baked beans (yes, you're baking baked beans. get over it.)
1 sweet onion
2 cups brown sugar
bacon (I used pork jowl bacon - yum)
tabasco sauce (the recipe I saw online called for chili sauce, but tabasco is what I had)
mustard


Directions
Cook the bacon & crumble it.  Mix together all ingredients to taste.  Cook for 45 minutes to 1 hour at 350 degrees.


I forgot to take a picture.  Here was what was left!  I actually thought when it came out of the oven that it tasted kind of funny, but people love love loved it.  And I think by the time I got to my location the flavors had time to "marry," or whatever it is flavors do.

Home Project - The Thing

I have this thing in my kitchen -- I never know what to call it. It's a shelf, pantry-type thing. I generally refer to it as, "that thing in my kitchen." Thing is, the thing is pretty ugly.

See? Ugly.   But functional! So I decided I should paint it.


Of course, in addition to being ugly, it's also cheap (read: particle board). Luckily, there is a primer you can use on particle board. It's this Zinsser stuff.


Then I painted it a greenish color similar to my welcome sign.  The paint is called "Quaking Grass."


The finished product. You might still think it's kind of ugly.  But you'd be wrong and nobody asked you anyway.

The end.

Saturday, April 23, 2011

Easter Eggs

I had a small person guest this weekend.  Weekends, it turns out, are really long when you have to entertain a small person guest.  We filled up some of the time making Easter eggs.  I didn't feel like boiling them, so I used hollow eggs.  Of course, to get hollow eggs, one has to make hollow eggs.

First, get a decent sized needle. (I made more eggs after an initial dyeing, which is why my fingers are stained.)


Use something to hammer the needle into the egg.  I used the handle of a knife.  Of course, be gentle.


You end up with a tiny hole.  You can do this on both sides, but it makes blowing out the egg quite difficult, so I chose an easier, slightly less aesthetic route.  The other hole will be bigger, so I put the little hole on the top (smaller portion) of the egg.


You can just use the same needle and make a larger hole on the bottom and blow out the contents.  I happen to have a meat injector, which I chose to use as an egg remover.  The needle of a flavor injector is significantly larger, so it's easy to make big cracks.


Again, use something to gently hammer it into the egg.


Very carefully pull up on the injector to remove a large portion of the egg.  You can put the injector back in, but that risks more cracking.  I decided to blow the remaining egg out.  It is probably horribly unsanitary to put your lips on egg shell, but I rinsed them off.


As you can see, the hole is much bigger, but it's not too bad.


Here's the thing about kids and dyeing eggs.  They have zero interest in keeping colors separate or keeping their fingers clean.  Fingers getting dyed is particularly a problem with hollow eggs, as they float.


Most of the eggs end up some sort of greenish brown shade, because the egg is indiscriminately dipped into all colors and everything gets mixed up.  The ones in the first row were completed before there was too much contamination.

Kitchen Chalk Board


I sprung forth from the kind of people who just love to pick trash up on the side of the road and call it a "treasure" -- in general, I have accepted this particular fate. I found this shelf door a long time ago. Or, maybe my mom found it and I stole it from her basement? Who knows. Anyway, I had some vague vision about what it could become. My vision was considerably more awesome than what I actually ended up doing, but that's OK too.


First I sanded the whole thing down. I didn't sand it perfectly, because I wanted the texture to show through. Also, I'm pretty lazy.


Then I painted it with magnetic paint.  As usual, I painted first, then read the directions.  The directions pretty clearly state that the surface needs to be extra special smooth for magnets to work.  Due to my creative (lazy) plan to leave a rough finish, the magnetic quality is pretty weak.   Next I painted it with this stuff, which is paint that turns any surface into a blackboard.


I painted the border a similar green to the original, but you can't really see it in the picture. Now it hangs in my kitchen, welcoming all to my humble home! =)