These tasty little treats are supposedly easy -- but it was not until after one major burn, 10 minutes of tears, 5 hours spent picking out the red, white, and blue and sprinkles out of a rainbow sprinkle jar, and one husband's last minute trip to the grocery store for more chocolate to replace the chocolate I burned later, I finished these things.
These probably took about 10 hours if you include the baking, cooling, and sprinkle selecting.
Ingredients:

Cake,
Icing,
Sticks,
Melting Chocolate (I used melting chips at first, and then I switched to chocolate almond bark)
Sprinkles
Recipe:
Make a cake using the cake recipe of your choice. I used a box cake (Half of them were red velvet, and the other half were strawberry).
After you make the cake, let it cool in the fridge for about an hour.
Then mix in whatever icing you want. I was going to make homemade icing, but instead I bought icing. For the red velvet I mixed in cream cheese icing, and for the strawberry I mixed in rainbow chip.
I mixed in about 3/4 of the jar. The constancy should be pretty doughy.
After you mix it, place the bowl in the fridge for an hour or two.
Then roll the cake into balls, and place in fridge for an hour or two. I would then place the sticks in the dough in the balls, and put back into the fridge for a minute.
Then melt chocolate. This is when Brandon saved the day. My family makes candy every Christmas, and we made truffles for my wedding, yet we can never get chocolate to melt right when we dip stuff in it.
I started with melting chips, and I used the microwave directions. This worked alright for the first three cake pops, but then the chocolate got too clumpy. So the chocolate did not go on smoothly, and it took so long to try it melted the cake pops into blobs.
So at this stage of the game the cake pops were melting everywhere and chocolate was bumpy and ugly.
I decided to reheat the chocolate, which ended up burning the chocolate and burning my hand badly. I then threw a few melted bumpy chocolate balls on the ground in frustration because this was about 8 hours into make cake pop making experience, and I had no more milk chocolate and they looked awful. So, I went to Brandon in tears with my burned hands asking him to buy more chocolate. He went to the store as I pouted on the couch... not one of my finer moments.
I still had not tried the white chocolate, so I got out my double boiler, and melted the white chocolate. I made sure the water did not touch the top pan, and turned the heat to low once it started simmering. You are supposed to take it all the way off the heat, but from previous experience it gets too lumpy with no heat.
I then started to dip the pops into the white chocolate, but it took me too long, so the pops still melted off the stick. At this point Brandon returned with more milk chocolate, and asked if he could try dipping them. Of course, he has no problems dipping the pops, and every pop comes out covered and silky smooth.
I then put the sprinkles on every pop.
----------------------------------------------------
At this point it is appropriate to take a detour, so I can tell you about the 5 hours I spent working on the sprinkles while the cake cooked and cooled. I wanted to make these cake pops Fourth of July appropriate, but I only found a small jar of red, white, and blue cylinder shaped sprinkles. I really wanted the tiny ball sprinkles, but I could only find rainbow. I thought, "Hey, it will take no time to pick out the red, white, and blue ones." FAMOUS LAS

T WORDS! Brandon walked in after I had tried picking out the correct colors with a tweezers for an hour, and I had about 10 sprinkles of each color. He returned 4 hours later, and I was still sitting on the couch sorting the colors. I finally, quit after he laughed at me and I realized I only had enough for maybe 15 cake pops. I should never have tried this, but once I started sorting the sprinkles, I felt pot committed... or make sprinkle committed. :) I think without this step, these cake pops would not have taken me all day.
----------------------------------------------------
Back to the dipping in chocolate stage. I placed the cake pops on Styrofoam to cool, but noticed the were slipping down the stick. We lost about 5 pop sticks in this process, and I was worried we would lose our labor of love. We have no AC and the kitchen was hot, so I started putting the Styrofoam tray in the fridge to let them cool, right after I got the sprinkles on them. This fixed the problem.

After they cooled, I tied an appropriately colored bow on the sticks to up the cuteness factor.
They are pretty rich, so I was worried they would be too sweet, but luckily everyone loved them.
What I learned from this process.
1. It is hard to make food cute... These things started to feel like a craft.
2. From this point on, Brandon will always dip things in chocolate. (I am making chocolate wands for my Harry Potter party this week, and Brandon may have to stay home from work to help).
3. Do NOT ever

sort sprinkles.
4. It is easier to make cake balls over cake sticks... don't have to worry about getting them to stay on the stick)
Oh, and please comment about how you really like the cake pops with the ball shaped sprinkles over the regular sprinkles. :)


 T WORDS! Brandon walked in after I had tried picking out the correct colors with a tweezers for an hour, and I had about 10 sprinkles of each color. He returned 4 hours later, and I was still sitting on the couch sorting the colors. I finally, quit after he laughed at me and I realized I only had enough for maybe 15 cake pops. I should never have tried this, but once I started sorting the sprinkles, I felt pot committed... or make sprinkle committed. :) I think without this step, these cake pops would not have taken me all day.
 sort sprinkles.
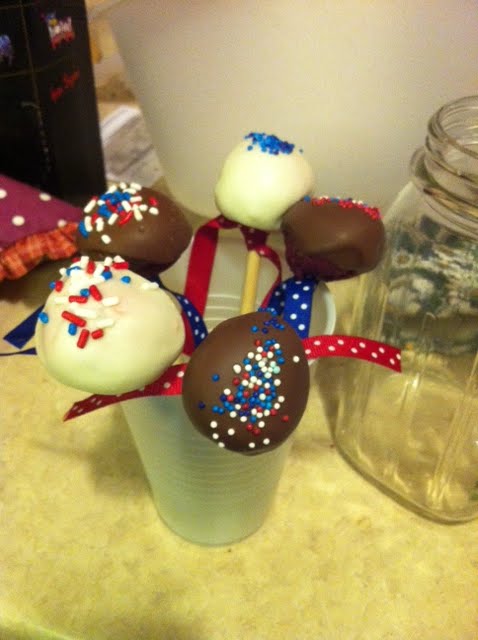
